
Making Easy Striped Quilt Binding: The Fold First Method
Quilt binding is the start of the final step in completing your beautiful quilt. It not only gives your quilt a clean, finished look but also helps protect its edges, ensuring it lasts for years. Whether you're a beginner or an experienced quilter, mastering the art of making quilt binding is essential for creating beautiful quilts.
In this step-by-step tutorial, we'll focus on making the binding itself, an important part of quilt-making. There is also a video tutorial if you prefer.
https://www.youtube.com/watch?v=DvBLmkfqWec

Choosing The Right Fabric For Binding
Before you start making your quilt binding, it's important to select the right fabric. The binding fabric should complement your quilt's design and color scheme. Here are some factors to consider when choosing your binding fabric:
- Color and Pattern: The binding can either blend in with the quilt or provide a striking contrast. Make sure it complements your quilt top.
- Fabric Type: Cotton is a popular choice for binding due to its ease of use, durability, and the wide variety of colors and patterns available. However, you can experiment with other fabrics like minky.
- Pre-Washing: To prevent shrinkage or color bleeding, it might be a good idea to pre-wash your binding fabric before using it.
Calculating The Amount Of Binding Fabric Needed
To determine how much binding fabric you'll need, follow these steps:
- Measure the perimeter of your quilt. This is the sum of all four sides.
- Add 10-12 inches to account for corners, overlaps, and extra length for safety.
- Divide the total length by the width of your chosen fabric (typically 42 inches) to determine how many strips you need to cut.
- Each binding strip will be 2 ½ inches wide.
Cutting The Binding Strips
Now that you know how much binding fabric you'll need, it's time to cut and join the binding strips:
- Cut the binding strips: Measure and cut strips that are 2 ½ inches x WOF (width of fabric).
Joining The Binding Strips
This is the magical part
- Take each strip and press or finger press each right end at at 45 degree angle, as pictured.
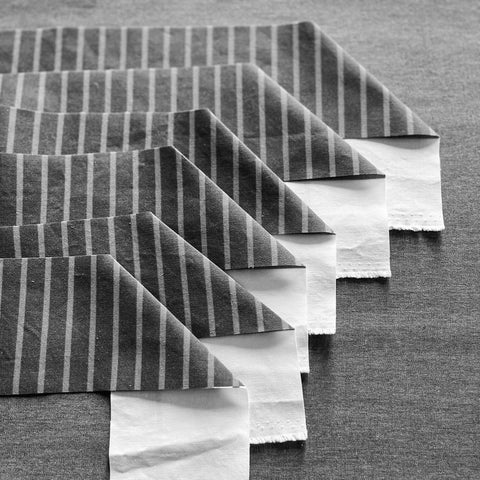
2. Place it on the left end of a different strip and line up the stripes. Make sure the top edges and bottom edges are even.

3. Slide your hand under the top layer, while holding that in place, flip the top layer up and pin on both sides of the crease.

4. Draw a diagonal line following the crease, from top left to bottom right.

5. Sew on that line or a stitch width to the left of the line.

6. Repeat this process for all your strips until you have one long, continuous binding strip.
Trim And Press
- Trim ¼ inch from the stitch line, and trim the dog ears (the triangles that stick out from the edge. Do this for each seam.
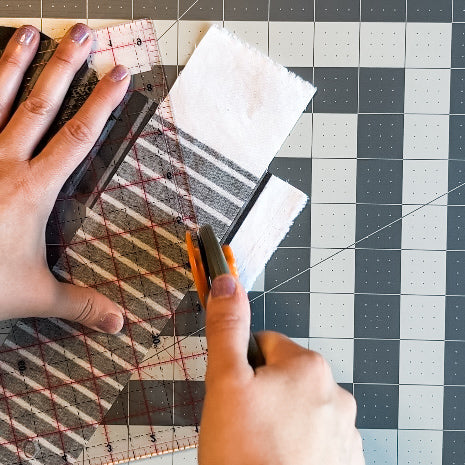
2. Press all seams to one side.
Preparing the Binding Strip
Before attaching the binding to your quilt, you'll need to prepare the strip:
- Fold the strip in half lengthwise with the wrong sides together. Press it to create a crease down the center.

2. I like to loosely fold it into a squished roll that is secured with clips.

With your binding strip prepared, you're now ready to attach it to your quilt. This step involves sewing the binding strip to the quilt's edges, providing a neat and protective finish. By choosing the perfect fabric, calculating the necessary length, cutting and joining the strips, and preparing the binding strip, you're well on your way to mastering the art of quilt binding. Stay tuned for an upcoming blog post, where we'll cover the process of attaching and finishing quilt binding to achieve a polished, professional look for your quilt. I was just eager to share how I do striped binding.
Happy quilting!
4 comments
Jo, I watched your video that’s a part of the Quilt2024 sessions. For years, I could not understand how to properly join the binding at the end of the quilt – and now I get it thanks to your video! Your website is now on my quilting favourites list. Thanks!
Beautiful clear directions, well paced. Good job !
Very interesting and helpful binding workshop on Quilt 2024. Thank you.
I love striped binding. Thanks for the tutorial. It is very helpful and really adds to the appearance of the quilt when the stripes line up!